Club Apiary Journal for 2014
by Caroline Abbott
 October 23, 2014
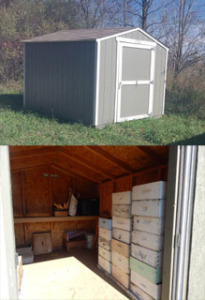
Today our new shed arrived in the club apiary! It is an 8 X 10 wooden structure with an attached floor. The bottom boards are treated and it is painted with special paint that absorbs into the wood to make it last. It was fully assembled and was unloaded and placed by the company we bought it from, so it was fully functional immediately. We moved the pile of empty equipment that had been sitting on the concrete pad into the shed. We also added to it all the equipment that had been stored at Caroline’s house. Now all the club equipment is right there, so if we need anything on a field day, it is at hand. We also can clearly see what we have, so we don’t go out and buy equipment we don’t need. Best of all, it is all safe and dry and protected from all the elements. If you have a chance, thank the members of the Bee Club Board for approving this shed for our use.
October 11, 2014
Today was a beautiful day for finishing up the winterizing for the club hives. We leveled the hive that Irene Day had insulated with the foam insulation. We then wrapped the middlehive with reflectix and put a layer of tar paper over that. We reduced its entrance 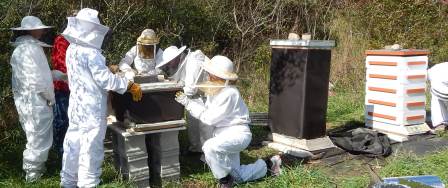 and flipped the inner cover over so that it had a top entrance that was not blocked by the insulation we put in the top. We put an absorbant blanket in the top. We used a 2″ spacer board to create the space for the blanket. We put a wooden entrance reducer in the entrance. We made sure we had a heavy rock on the top. Although we had worried this hive had gone queenless last month, we were happy to discover it felt much heavier this month. We leveled it, so we felt its weight. We did not choose to feed, however. We saw many bees entering the hive with full pollen baskets, too. So, we got it ready for winter and if it survives, great.
We added a layer of tar paper around the long hive to cover the reflectix for two reasons: We wanted to cut down on the reflection so the bees wouldn’t get confused and miss the entrance in the winter, and we wanted to put another protective layer on the outside. We flipped the front two inner covers on that hive so they had ventilation from the top. We then put a blanket in the top of that hive, also with a spacer board, for insulation and water absorbtion. We stapled a 1/2″ hardware cloth piece over the larger part of the entrance of the long hive to keep mice out.
The Club Board has approved and purchased a storage shed for us for the club equipment at the apiary! It will be delivered sometime in the next two weeks, so we can get all our equipment stored away before winter sets in.
September 13, 2014
We had a cool but dry day for our September field day. It was very appropriate weather for our scheduled topic – preparing for winter. Our one hive was already winterized as described below with foam insulation. We added the entrance reducer to prevent 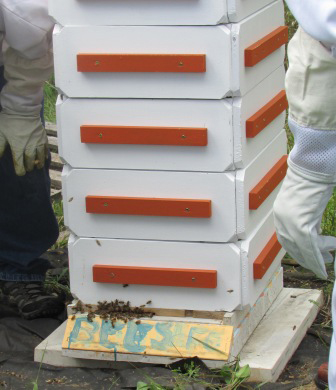 robbing. We also took off the top super which they had stored more honey in since we added it, and then we put it on the hive that was robbed out for now. My thinking was that if it could help that hive at all, it would and if not, the other hive would rob it back out and put it in the existing five boxes, so we wouldn’t have a six box tall hive going into winter. I may still move it back, I will decide on a nice, warm sunny day.
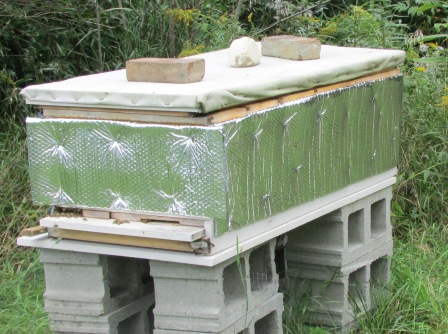
We skipped over the hive that is robbed out for now, and went to the long hive. We had a roll of Reflectix insulation – 16″ high by 25 feet – $13 at Menard’s. We stapled it on the side of the long hive. According to the package, it has an r-factor of 6 at only one layer. The foam insulation only has an r-factor of 5. We doubled it over when we stapled it because the hive was only 10 inches and the insulation was 16″. We think this should be sufficient for the sides. We placed a 3/4″ solid board under the long hive because it has a very thin bottom board. We will not further reduce its entrance, but later on in the season will staple 1/2″ hardware cloth over the larger opening. Also after danger of robbing is past, we will flip one of the inner cover boards so there is a vent out the top. We will also put a blanket of absorbent material in the top and possibly a sheet of the Reflectix on top of that.
After finishing up the insulation we returned to Caroline’s garage for a discussion of other options for overwintering. Next month we will finish up and if we think the one remaining hive is viable, will winterize it.
September 8, 2014
The two vertical hives were sitting on very old and deteriorating wooden pallets, so it was necessary to remove the pallets and place something more sturdy underneath. Not wanting to raise the height any more than necessary, we decided to get 24″ square patio blocks to put underneath each hive. The original package hive that Irene Day had insulated had a rotten bottom board, also. Since the weather was pleasant today, we decided to take advantage and move the hives off the old pallets and onto the patio blocks. First we approached the smaller split hive. I noticed several things immediately that did not look right. 1. – There were a lot of bees going in the inner cover upper entrances holes, 2. There were a lot of dead bees in front of the hive entrance, 3. There were yellow jackets gaining entrance to the hive. These are all signs of robbing. This time of year it indicates queenlessness and a hive too weak to defend itself. So, we opened the hive and began to unstack it. Each box had abnormal activity, meaning the bees were scattered about the box, not working in an orderly manner as they should be in a queen-rite hive. Then, the tell tale sign – each box as we lifted it and took it off was light, extremely light, as in robbed out of all honey. So, we went through the motions of taking down the hive, removing the pallet, replacing it with the patio block and setting the hive back up in order, but it is only an exercise. That hive is gone, dead, empty. So, what happened? Well, remember back when I attempted to mark the queen in the spring? I got her covered with paint. I worried then that she wouldn’t survive. Well, she may have for awhile, then she died, I don’t know. They were putting up honey even up to last month, so maybe something else happened. All I know is that there is nothing salvageable left in that hive.
Fortunately, the hive Irene worked so hard to insulate looks extremely strong. I am sure a lot of that honey from next door ended up in that hive. So, now we had to take down that entire booming hive and replace the bottom board and hive stand and put the patio block down. So, we just dived in, what else could we do? We worked as fast as we could, being careful to only pry the hive bodies on the very corners so we didn’t damage the insulation. We took the pallet out, placed the patio block down and put a new hive stand and a good solid bottom board down. At this point we should have leveled the hive before stacking it back on. Unfortunately I had forgotten to bring my leveling tools. At this point in the season they will not be building new comb, so it is OK that the hive is not level (and it certainly is not level!). I don’t want to tear that wonderful hive down again this year, so we will wait until spring when it is lighter and smaller and level it then.
I didn’t want to check inside the long hive because I didn’t want to expose them to any attempt at robbing. We will insulate the long hive at the field day on the 13th, and will discuss how we would have insulated the third hive. We may still demsonstrate it next month on that hive even though it is dead, just for practice.
September 3, 2014
Club member Irene Day volunteered to prepare hive boxes with polyfoam insulation according to the method invented by Robert Williams. We decided the easiest way to do it in the club hives was for Irene to take home empty equipment and prepare it there, then bring it to the club apiary where we would transfer one hive into the prepared equipment. Today was a nice day to do such a delicate task. We had to remove every single frame from a very strong hive and transfer them one by one into the newly prepared equipment. We tried to get our smoker going, but it really didn’t want to cooperate. Irene’s beesuit got tested early on, and she discovered she had left some small opening in her veil. After fixing that, we had no further incidents, though we both agreed it would be a great lesson to those who think it is a good idea to work the bees without a beesuit! We first tore down the hive, placing each box backwards – top box on the bottom, then the next on that, etc. We made sure the whole stack was carefully placed on the upturned top cover to prevent losing the queen in all this. When we got to the bottom board we realized it was in very poor shape. Since we need to take the hive down one more time this season to place a solid cement block under it, we decided to leave it for now. There is a much better one in storage that belongs to the club we can put down before winter. Irene put the first of her newly prepared boxes on the bottom board, then we moved the box that was now on the top of our stack, but was the bottom box on the hive, over next to our new box. Working quickly as a team we took each frame out of the old box and placed it in the new, being careful to keep everytihing in the same order it was in. We repeated this with each of the next four boxes – the hive had five mediums on it. There was a lot of honey and it was full up to the top box, so we added a rather shabby top super with newly extracted combs to give them some more space for now. That will not be left on for winter, so it is OK that it isn’t insulated and doesn’t look as nice as the rest of the hive. We then added a special inner cover that has an upper entrance built into it. Then we added the top cover that Irene had modified so it is now insulated. The bees finally calmed down a little after we got the hive closed! We knocked the bees out of the newly emptied equipment and stacked it on the cement slab next to the rest of the empty equipment. We then collected one full frame from the horizontal hive to sell to Dale Anderson of “Confections with Convictions” out of Kalamazoo to make comb honey bon bons with.
August 9, 2014
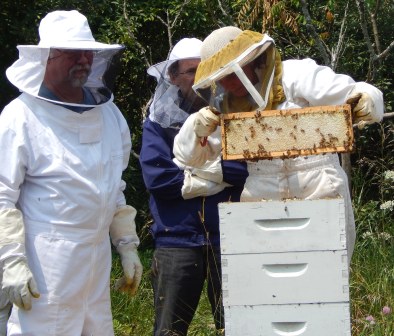 We had pleasant weather again for our August field day. About 20 people were in attendance. Many had come for the first time. The first hive we opened was the original package hive. Last month we collected six frames of honey from this hive and added an empty super. In the empty super we put a mixture of foundationless frames and empty frames with plasticell foundation. When we opened the hive we found the bees completely avoided the plasticell, to the point of forming comb up from the frames below into the foundationless frames. They had completely packed the super below which had six empty frames three weeks earlier. So, we removed all the empty plasticell and found some drawn comb in our empty equipment to replace those frames with. We collected six more frames of honey from this hive. There was a full ten frames in the second box down, but we wanted to be sure not to take too much right now. We replaced those with drawn comb from our empty equipment. Our conclusion is that at least this season the bees do not like the plasticell and will do everything they can to avoid drawing it out.
We checked the other vertical hive next, which is the small split which made its own queen. We found the exact same situation there, the bees were avoiding the plasticell. So, we again removed all the empty plasticell frames and replaced them with drawn comb from our equipment stack. We were able to collect three frames of honey from this hive, which is quite remarkable considering it started from three frames of brood and the returning foragers from the other hive. We were conservative there, also, we could have collected more, but wanted to err on the side of caution and also to have an even division of three frames for extracting.
Next we checked the long hive. They had completely replaced and filled the three frames we had collected last month. We put the three empty drawn combs back in at the back of the hive for them to fill up. We did not collect any more from that hive, wanting again to be sure that we leave enough for winter.
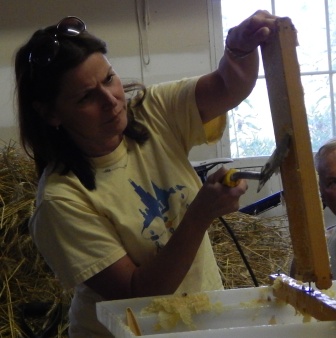 After finishing up at the apiary we went back to Caroline’s garage to uncap and extract our nine frames of honey. Each medium frame yields about 3 pounds of honey, which is about a quart. We uncapped all nine frames and extracted them. Several people tried uncapping and we discussed various methods for uncapping, using a cappings scratcher, a hot knife, cold knife and a roller. We also discussed crush and strain and the options available for making comb honey if one doesn’t have access to an extractor and only has a few frames of honey. We then bottled a few one pound bottles, discussing and demonstrating Michigan labeling laws. Attendees immediately bought the bottles to take home.
Next month we will discuss and begin winter preparations. Our plan is to insulate all three club hives. We will make plans on how to do that, the horizontal hive will have different challenges than the vertical hives, but we already have some good ideas from people who are attending the meetings.
July 19, 2014
We had another gorgeous day for a field day, temps in the low 80’s and lots of sunshine. All three hives looked nice and busy when we arrived, which was a good sign, and a relief to me, that our clumsy marking of queens last month didn’t do any damage.
We first checked the vertical package hive. We found the top super completely full of honey. The outside four frames were uncapped, which may have been because they were completely full and didn’t want to cap those in case they needed to use those cells to put more honey in. We collected six fully capped frames, replaced those with empty frames and then added a full super of empty frames on top so they have plenty of room to store honey. Sometimes when they are full they won’t swarm, they will just quit working and not store any more honey, especially as the season progresses past normal swarming season.
Next we checked the small split. It was doing wonderfully. It had its super about half full, but not capped. We added another empty super on top so it would have plenty of room, since we usually only check those hives once a month during field days and the honey flow is on right now.
We moved on to the long hive next. It had started working on the 24th frame out of 32! Very impressive. We took out three very full frames of honey and replaced those with empty frames.
We took the six medium and three deep frames back to the garage to extract. We uncapped and extracted all the frames, getting around two gallons of honey. We bottled up 18 one pound bottles right there and labled them so they can be sold immediately.
June 21, 2014
We had a beautiful day on the first day of summer for our field day. The clouds quickly gave way to a sunny sky and pleasant temperatures to check the bees. We were anxious to check the split to see if it had successfully made a queen. The top box was an empty super put on two weeks ago, the second box had honey in it. The next box down was the one we were interested in. It had the brood. We found lots of brood, young and capped, then we saw her! A beautiful, big Italian queen. That was interesting since her mother was a Carnolian, but obviously her father was an Italian. Since we had a marking kit with us, we were able to get her marked, although it was a little messy due to my inexperience at marking queens.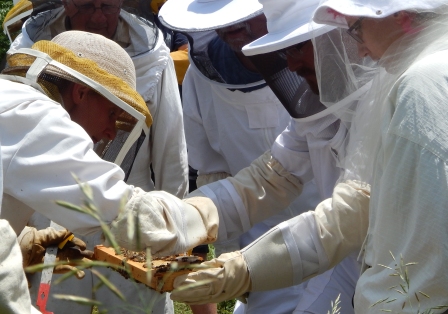
Next, we opened the “mother” hive. It’s top box was mostly empty, but the next box down was completely full of honey, although it wasn’t capped yet, so not ready for harvest. In the next box down we found a lot of brood and our lovely, Carnolian queen! We decided to mark her also, since it would make it easier to spot her on field days. The pen was messy, and she was moving, so we got some paint on her wings. One of the ladies attending said she had read that the attendants would clean that off if it was still wet, so we quickly released her and hoped that it didn’t cause her any harm. We decided not to check the last box, since everything else looked so good, so we closed up that hive and moved on.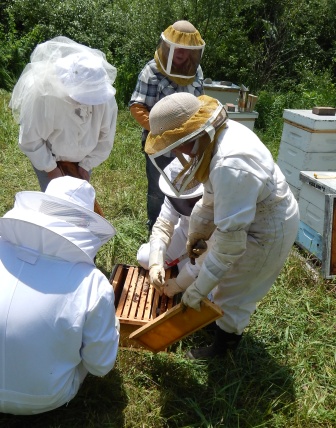
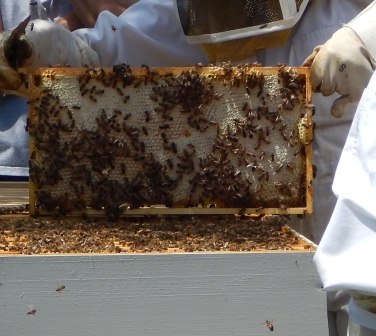
Then we opened the horizontal hive. The bees had propolized the screen on the first two inner covers. They had filled out to the nineteenth frame. There were around four or five completely full, capped frames of honey, then in front of that the frames had brood, lots of brood. Since it was looking so good, and we didn’t want to disturb it too much, we passed around one of the full frames of honey, then replaced it all and closed up the hive. We figured we had already found the queen in two hives and that one was obviously there and doing her job well, so we didn’t want to disrupt it more than necessary.
Lastly, we all cooperated and scraped and cleaned up all the frames in the empty equipment. There were several families of mice and a lot of ant colonies that got displaced by our efforts. We had moved a slab of concrete over earlier in the day, which we were able to stack the cleaned equpiment on. We sealed up any openings large enough for mice to enter with tape. Hopefully the equipment will stay in decent shape in this arrangement.
June 6, 2014
Prior to leaving town for 10 days, I added a super to each of the Langstroth hives. Both the split and the “mother” hive look good. The “mother” hive, which was the one we rubber-banded the comb into had several rubber bands pushed out the front entrance! I removed them. I didn’t look inside, just put a super on, so we can look inside on the next field day. There is a lot blooming over in the club apiary and the bees were busy. The long hive had activity out to two-thirds of the hive. There wasn’t a lot of new comb building, but they had drawn comb built out that far already, so apparently didn’t need to build more yet. It looks really good, though.
May 24, 2014
Sorry no pictures, today, just an update on the hives. We decided to do a split like I discussed at the last field day, using C. C. Miller’s method. We went into the vertical hive and found one frame with eggs. We notched three cells with eggs in them and placed that in an empty medium box. We checked very carefully to make sure the queen was not on the frame. Then we found a frame of mostly capped brood and put it in the box, too, also making sure the queen was not on it. We decided the hive was strong enough to be able to give up three frames of brood, so we took another frame of capped brood, again making sure the queen wasn’t on it. This was the hive we rubber-banded the burr comb into the empty frames. They had attached the burr comb and built it out somewhat. They had also built new comb in the adjacent frames, one of them was 3/4 full of comb and had drone brood in it. The bottom box was completely full, even out to the 10th frame, so after moving the brood nest back together and adding three empty frames on the outside, we moved the hive over to a new location, added a top, empty box, and closed it up. We then put the new split on the location of the original hive, which gives it the returning foragers. We also put an empty box of drawn comb on that hive. Since our next field day is not for a month, we wanted to make sure there was plenty of room for them. We chose today to do this because: Our next field day is not until June 21st, which is the summer solstice and marks the end of the time of year for making splits. I like to leave these splits a whole four weeks before checking, just to make sure they have time to raise a queen and for her to get mated and start laying. Right now is optimum forage and perfect time for raising a new queen and for the hive to build up adequately to produce honey this season. So this way we will be able to check this hive at the next field day to see if they successfully raised a new queen.
May 10, 2014
Today was a beautiful day for a field day, right around 70 degrees and mostly clear and only a light breeze. This is the first field day since installing the bees, so we were going to check their progress and remove sugar water cans because the dandelions are in full bloom as well as a lot of other things, so there is adequate natural forage for the bees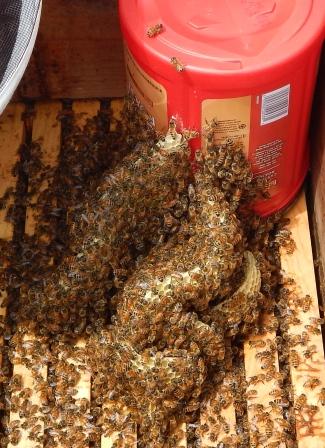 at this time. First we opened the regular hive. Apparently we had not given them enough space for the queen to lay eggs! Here is a picture of the burr comb they produced to give her more room. It is very curved because they attached it to the sugar water can and it was coming up from the brood box below. We had mixed empty drawn comb and honey frames in the bottom box, so the honey left no room for brood rearing, and we had not put an empty box on top for them to move up into. So, we got some empty frames and rubber bands and cut the comb out and put it in the empty frames secured with the rubber bands. Thank you to Mel Church for giving us a demonstration of how to do this. Even though it was a small amount of comb, it did have some brood in it, and we thought it was a valuable skill to demonstrate, so we put the comb in a couple of frames. We then put those frames in the center of an empty box, with three other empty foundationless frames with them. We then put empty drawn comb with foundation on the sides to help them make straight comb and placed the box on top of the brood box the comb came out of. We removed the sugar water can, of course!
Then we checked the long hive. The bees had pretty much worked out the first third of the hive and had a lot of capped brood. Not wanting to disturb things too much, we did not carefully check for the queen or for young brood because we didn’t want to keep the frames out of the box too long, or remove them too far. We think that is how we lost the queen last year. We removed the 2/3 cover board, the deep super that housed the sugar water and the sugar water can. We placed notched inner covers on that had a total of 13 notches for ventilation. Because our ventilation system last year allowed mice and robber bees to enter, we stapled window screen over the center holes in the inner covers so air could flow, but mice and robbers could not enter the hive. We then replaced the proper top cover on the hive. We were able to clean up the area, putting our displaced deep frames back in the boxes we had used to house the sugar water on the two hives and we got them all neatly stacked, safe from the weather.
April 16, 2014
We received two packages of Carnolian bees from AWS on the afternoon of April 14, 2014. The weather was very winter-like and the forecast for the next two nights was lows around 22 degrees. We orginally had planned to install the bees in the club apiary on the evening of the 15th, but the wind chills were at 17 degrees during the day and we had high winds and snow on the ground. The bees were in an un-heated garage and had a rough first night, so I put them in a brooder tank with baby chicks with a heat lamp to wait it out until we installed on the evening of the 16th. The high for the day on the 16th was around 48 d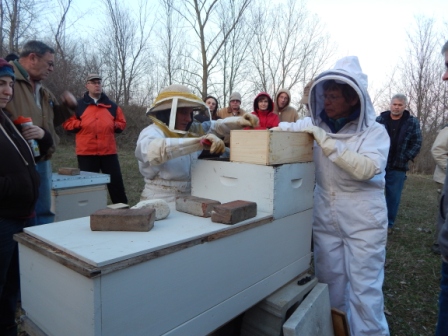 egrees and it was sunny, but still windy. We waited until 8:00 pm to install the hives. I had gone out earlier in the day and prepared the hives for installation. I mixed the frames in the brood chambers with drawn comb and honey frames. However I wasn’t confindent we had enough honey to keep them until we have enough natural forage, so I prepared to feed sugar water. I found empty hive bodies to place on top of both the regular vertical hive and the long hive. When we designed the long hive we cut a 2/3 piece of wood to use as a temporary top cover so we could use a regular hive body on 1/3 of the hive with a regular top cover to feed sugar water. So I set it up in that way. I wanted everything ready so we could quickly install the bees because it was cold, especially by 8:00 pm. Right at 8:00 pm we started. We opened the first package, removed the sugar water can and the queen cage. The queen looked lively. We popped her cork, placed her on top of the frames, still in her cage, dumped the bees in the package on top of her, put some crumpled up newspaper in the empty box along with a can of sugar water. The paper was to discourage the queen from going up and the bees building comb off the roof. We finished the regular hive, closed it up and moved on to the long hive. We repeated the process there. The bees were a little livelier, so we had to pound the box pretty hard to get them all out. We wanted as many as possible inside the hive because it was too cold for them to crawl in by themselves. We shut it up and hoped for the best. I will check them on a nice day in a day or two to see how everyone settled in. We will leave the sugar water on until there is adequate bloom for the bees to forage on their own, hopefully dandelions before too long.
April 3, 2014
Well, going into winter last fall we knew our long hive was dead, so we didn’t have to worry about getting it through the winter. Our one remaining live hive was a traditional vertical Langstroth hive. We had one of the coldest, snowiest winters on record. We did not wrap the hive, and at one point it was buried in snow up to the third box from the ground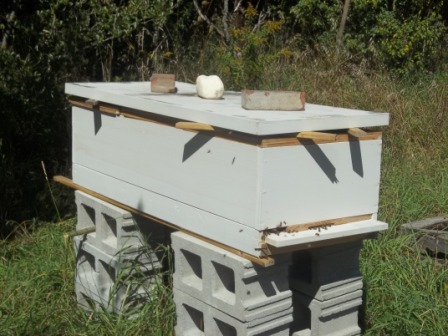 . The long hive, pictured at the right was buried up to its entrance which is three cinder blocks high. The winter was too much for the live hive. The bees survived for awhile, as evidenced by travel stains and some dead bees at the top entrance (the bottom entrance was buried all winter in snow). All winter it was impossible to get to the hives except on skis. In early March I skiied out to the hives and discovered the remaining hive was indeed dead. On March 31, 2014 I was able to get to the hives by walking down to them, the snow was melted. I took the hives apart and cleaned them up to prepare for packages coming in a week or so. There was very little mold in the vertical hive, which was a great relief. I cleaned up the few dead bees I found, there were not very many. The cluster was very small by the time it died, it eventually just got too small to survive the cold. There is about a box and a half worth of honey still on the hive, these were in the second and third boxes from the bottom. I will go back before the packages arrive and set up: 1. A bottom box with drawn comb and maybe an empty frame or two 2. A full box of honey (or mostly full) to place on top of the empty brood box to feed the new package. 3. a spacer so I can lay a queen cage on it if I decide to do that. I may direct release the queen if I feel it is safe. AWS doesn’t use introduction cages, so it is easier to direct release the queen if we feel the bees have already accepted her.
I took apart the long hive and cleaned off the bottom board. There were dead bees and a lot of wax particles from the robbing that occurred in the fall. Under the screened bottom board and on top of the sliding solid bottom board a mouse had taken up residence. I unceremoniously dumped her and her nest on the ground. I left the solid bottom out for now so she won’t move back in. I put it under the top cover for safe keeping for now. Otherwise that hive was clean because it was unoccupied all winter. I will put honey frames in it to feed the new package from the other hive. Last year there was adequate forage when we installed so we didn’t need to feed, but that will not be the case this year.